Swift Tips and Tricks February 2017: UI Text Field Styling and Force Touch App Shortcuts
By Kevin Hou
4 minute read
Useful UITextField Extensions
One of the side projects I’m working on is very frontend focused and after spending a lot of time on my designs, I really wanted to give my app a custom look and feel. As a result, I had of modify a lot of UI elements to fit my specific purposes.
Here is an extension for a UITextField that gives two functionalities. The first is a text field with just a bottom border (think material design). The second adds a done button to the keyboard like so:
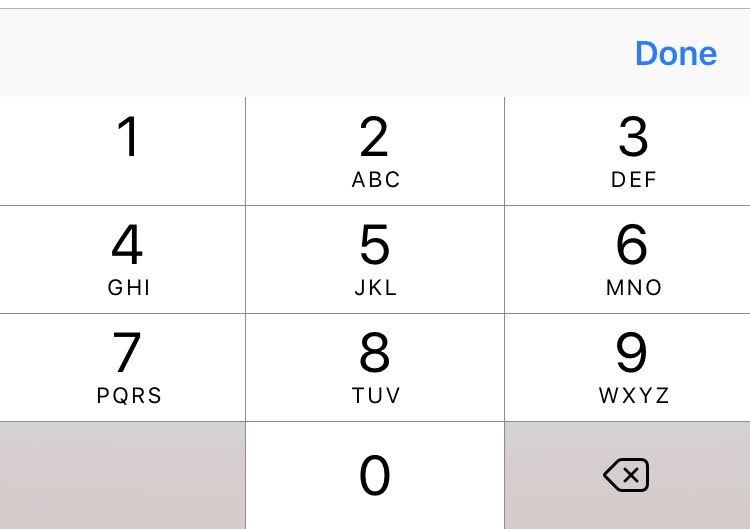
It’s very useful for the number pad input which doesn’t the native “Done,” “Return,” etc. buttons on the keyboard itself.
1extension UITextField {
2
3    // Set border to none in Storyboard and then call this function to add just a bottom border
4    func addBottomBorder() {
5        let bottomBorder = CALayer()
6        let width = CGFloat(1.0) // Border width
7        bottomBorder.borderColor = Colors.red.cgColor // Border color
8        bottomBorder.frame = CGRect(x: 0, y: self.frame.size.height - width, width:  self.frame.size.width, height: self.frame.size.height) // Frame
9
10        bottomBorder.borderWidth = width // Apply border width
11        self.layer.addSublayer(bottomBorder) // Add to text field
12        self.layer.masksToBounds = true
13    }
14
15    // Add done button to number keyboard
16    // Source: https://gist.github.com/jplazcano87/8b5d3bc89c3578e45c3e
17    func addDoneButtonOnKeyboard() {
18        let doneToolbar: UIToolbar = UIToolbar(frame: CGRect(x: 0, y: 0, width: 320, height: 50)) // Create keyboard toolbar
19        doneToolbar.barStyle = .default // Set style
20
21        let blankFlexSpace: UIBarButtonItem = UIBarButtonItem(barButtonSystemItem: .flexibleSpace, target: nil, action: nil) // Add blank spacing item to left of done button
22        let doneButton: UIBarButtonItem = UIBarButtonItem(title: "Done", style: .done, target: self, action: #selector(self.doneButtonAction)) // Add done button
23
24        doneToolbar.items = [blankFlexSpace, doneButton] // Create array of the items and add to toolbar
25        doneToolbar.sizeToFit() // Fit to screen size
26
27        self.inputAccessoryView = doneToolbar // Add toolbar to keyboard
28
29    }
30
31    // Function called when done button pressed
32    // Put manually put under action
33    func doneButtonAction() {
34        self.resignFirstResponder() // Desselect
35    }
36
37    // MARK - End of adding done button to number pad
38
39}
40
One of the things on my bucket list is to build and publish my own libraries. This would not only improve my own development and production speed, but also give you tools/UI tweaks that you might find useful. I don’t typically use libraries in my projects, but I do see their benefit. Because I’m focusing on the learning right now, I’ve been building my own “libraries” from scratch as a teaching tool for myself. Hopefully I can push one of those out to you all soon!
Force Touch Shortcuts
First you must setup your Info.plist file to give your app permission to use Force Touch app shortcuts. Here is a useful tutorial for doing just that: developer.apple.com
1// Launch a specific screen as initial VC
2private func launchInitialVC(viewController identifier: String) {
3    self.window = UIWindow(frame: UIScreen.main.bounds)
4    let storyboard = UIStoryboard(name: "Main", bundle: nil)
5    let initialViewController = storyboard.instantiateInitialViewController() as! UINavigationController
6    self.window?.rootViewController = initialViewController
7    self.window?.makeKeyAndVisible()
8
9    // Perform required segues and navigations
10    if (identifier == Storyboard.editEventDetails) { // If launching edit details screen
11        initialViewController.pushViewController(storyboard.instantiateViewController(withIdentifier: Storyboard.categorySelection), animated: false)
12        let categorySelection = initialViewController.topViewController as! CategorySelection
13        categorySelection.newEventNoCategory(self)
14    }
15}
16
Here are some other useful tools for giving your app Force Touch capabilities:
Useful tutorial: https://samwize.com/2016/04/25/tutorial-on-creating-app-shortcut-with-3d-touch/
Design guidelines on shortcut icons: https://developer.apple.com/reference/uikit/uiapplicationshortcuticontype
Hope this was useful! Sorry my blog posts have been fairly minimal in writing. I haven't had a lot of time this semester because of my heightened work load. Hope I'll catch a break soon so I can put some more time and thought into my pieces. Thanks!